On my 86th Windows Nano Server 2016, I showed you how to Deploy a Windows Container with IIS Install using the “easy” way.
As promised Yesterday, today you will see how I Install IIS 10 on My Windows Nano Server 2016 using the “hard And log Way :)”.
The process will take a few minutes If you’ve been following this blog and all the Nano, Windows Containers and Docker articles, If you haven’t I suggest you use the “easy” way article…
In this process, I’ll use Docker, Docker Shared Volumes, Windows Containers and DISM to get IIS Installed.
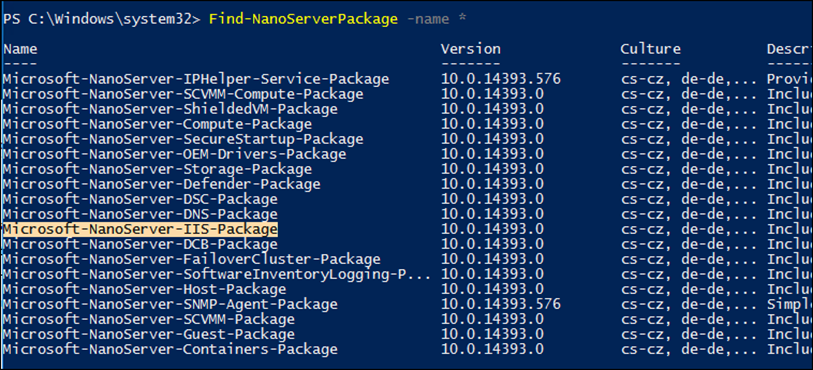
Step 1: Install Nano Server Package Provider And Download the IIS Package
On a management machine, I’ve Installed the Windows Nano Server Package Provider and I’ll download the IIS Offline Package for Nano Server
Save-Module -Path "$Env:ProgramFiles\WindowsPowerShell\Modules\" -Name NanoServerPackage -MinimumVersion 1.0.1.0

Import-PackageProvider NanoServerPackage
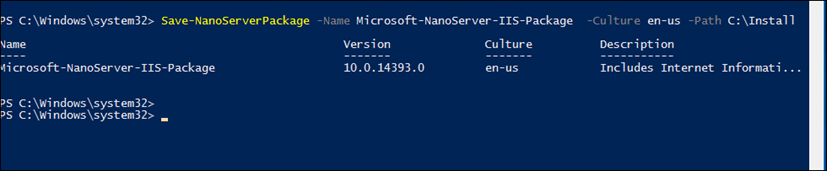
Below, I’ll download the IIS package
Save-NanoServerPackage -Name Microsoft-NanoServer-IIS-Package -Culture en-us -Path C:\Install
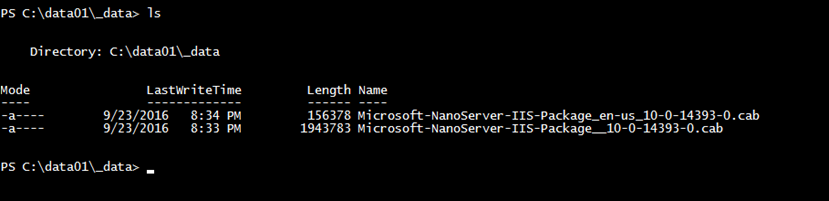
Step 2: Create a Docker Volume on the Container Host and copy the IIS Package to it
In step 2 I’ll create a shared volume on my Windows Containers Host and I’ll copy the IIS package to it.
docker volume create data


Once the volume has been created I’ll copy the IIS package to it.
Step 3: Create a new Windows Nano Container and map the Volume to It
Below, I’ve created a Windows Nano Server Container using the base Nano Server Image and mapped the volume from step 3 to it.
docker run --name nanoiis -p 80:80 -it -v c:\programdata\docker\volumes\data:c:\data01 microsoft/nanoserver cmd

Step 4: Copy the IIS Package files from the Map Volume to a local Directory on the Container using
From Inside the Container, I’ll copy the IIS Package from the Shared Volume to a local folder
New-Item -Name software -Path c:\software -Type directory
Copy-Item *.* C:\software
Step 5: Install IIS On Windows Container
If you made it so far, you are a Windows Container gun 🙂
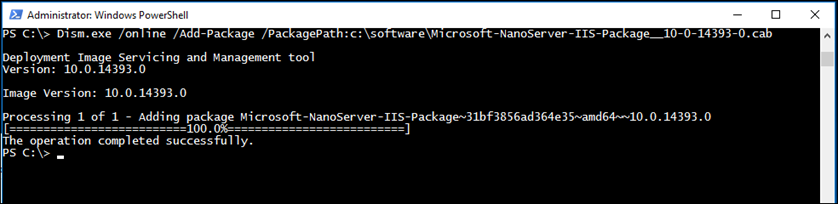
In this final step, I’ll Install IIS using DISM.
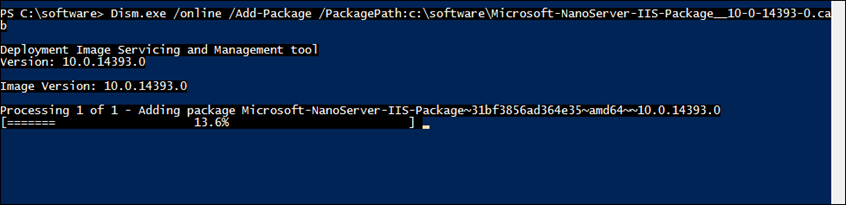
Note: Don’t run DISM from the same folder the IIS Package Is located, Best to run DISM from C:.
Dism.exe /online /Add-Package /PackagePath:c:\software\Microsoft-NanoServer-IIS-Package__10-0-14393-0.cab
Once the first package Installed successfully, Use DISM on the local package.
Dism.exe /online /Add-Package /PackagePath:c:\software\Microsoft-NanoServer-IIS-Package_en-US_10-0-14393-0.cab
Finally, Start IIS and WAS Services:
Start-Service w3svc,was
All done, IIS Is now deployed and working.
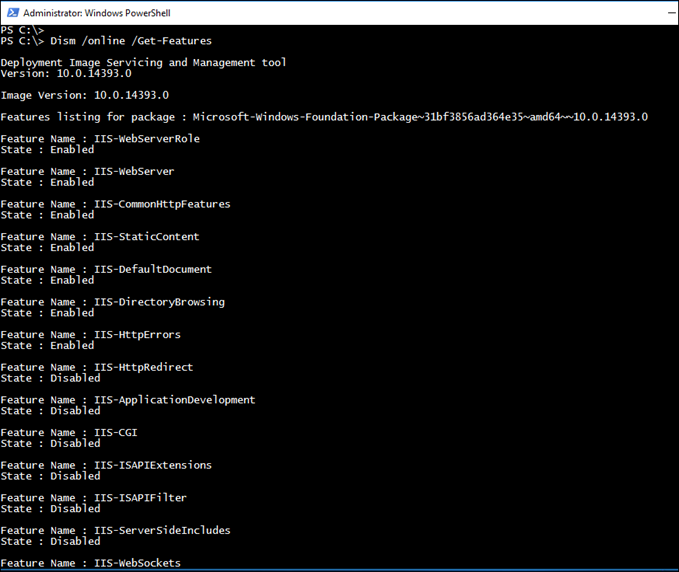
To view all Installed IIS Features run:
Dism /online /Get-Features
To enabled features use:
Dism /online /enable-feature /featurename:iis-logginglibraries
Or
Enable-WindowsOptionalFeature -Online -FeatureName "IIS-WindowsAuthentication"
Hand picked articles by the editor:
- How To Deploy Windows Containers
- How to Configure Windows Containers Networking
- Deploy IIS On Windows Nano Server 2016 Container