In this article, I’ll show how I create a new Window Server Container, Install IIS Web Server and save the container as a Docker Image.
By saving my Container as an Image, next time I would like to spin a new Windows Container with IIS Web Server I could use the custom Image and start an IIS Windows Container In a matter of seconds Instead of creating a new Windows Server container and then Install IIS.
The Docker Engine terminology for this process called Commit Which Is like creating a Gold Image using WDS.
To process of creating a Docker Image Is:
- create a Windows Container
- Install IIS
- Stop the container
- Run the commit command and save the Image
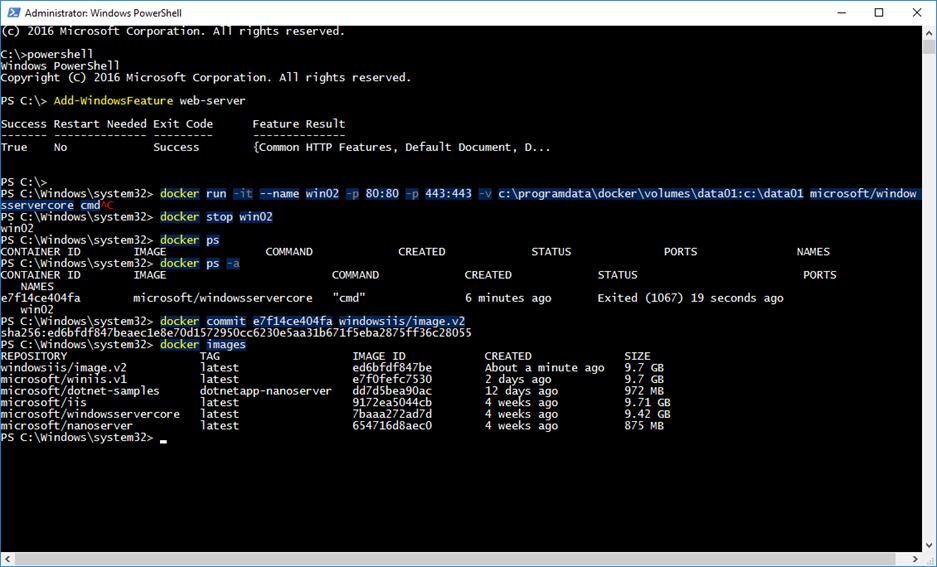
Below, I’ll create a new Windows Container called Win02 with shared Volume
docker run -it --name win02 -p 80:80 -p 443:443 -v c:\programdata\docker\volumes\data01:c:\data01 microsoft/windowsservercore cmd

Once I enter the container, I’ll start PowerShell and Install IIS Web Server
Powershell
Add-WindowsFeature web-server
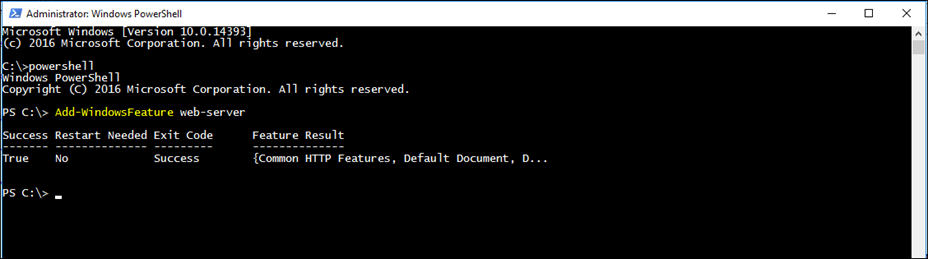
Once IIS Is Installed I’ll exit the Container using
Ctrl + p + q
Next, I’ll stop the container:
docker stop win02
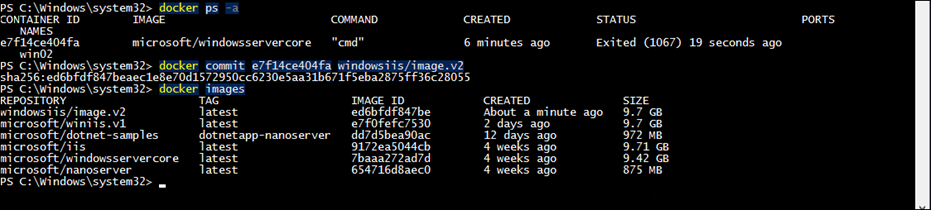
Check the container Docker ID using the line below:
docker ps -a
And finally, Commit the container as an Image:
docker commit e7f14ce404fa windowsiis/image.v2
When done, If I take a look of all the Images I’ll see my new Image
Docker images
- Part 1: Deploy Docker Container On Windows Server 2016
- Part 2: Deploy Docker On Windows Server 2016
- Part 3: Download Windows Images For Docker
- Part 4: Create A Windows Server 2016 Container Using Docker
- Part 5: Install IIS On A Windows Docker Container
- Part 6: Connect A Windows Container To A Shared Storage With Docker