This blog post will show how to create a file association in Windows 10 or 11 that can be used with services like Microsoft Intune.
In our previous post, we used a file association to configure Google Chrome as the default browser on managed machines. In the post, we only showed the output to simplify the process for Administrators that only need to set Chrome.
Today we will show how we created the file.
File association
A file association is a relationship between a file type and the program that will open that file type. In Windows 10, you can change the file associations for a particular file type or all file types. You can also set the default program to open files of a specific type.
To create a file association, log in to the Windows 10 or 11 machine and go to Settings -> Apps – > Default Apps and select the application (Chrome in my case) you would like to create a file association for.
In this post, the goal is to set Google Chrome as the default browser.

I click on each file type in the set default file types I would like to set Google Chrome to open. Because I need to set Google as the default browser, I will select .htm. HTML, HHTP and HTTPS.

From the menu that opens when clicking on a type, I will select Google Chrome.

Run DISM
After settings all the default file types, it is time to export the configuration using the following command.
dism /online /export-defaultappassociations:appassoc.xml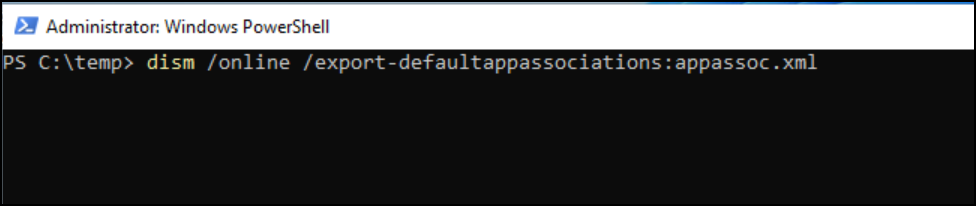
The output file will look like this and have a . XML extension.
<?xml version="1.0" encoding="UTF-8"?>
<DefaultAssociations>
  <Association Identifier=".htm" ProgId="ChromeHTML" ApplicationName="Google Chrome" />
  <Association Identifier=".html" ProgId="ChromeHTML" ApplicationName="Google Chrome" />
  <Association Identifier=".shtml" ProgId="ChromeHTML" ApplicationName="Google Chrome" />
  <Association Identifier=".xhtml" ProgId="ChromeHTML" ApplicationName="Google Chrome" />
  <Association Identifier="http" ProgId="ChromeHTML" ApplicationName="Google Chrome" />
  <Association Identifier="https" ProgId="ChromeHTML" ApplicationName="Google Chrome" />
</DefaultAssociations>
Encode file to Base 64 format (optional)
If you need to encode the file to a Base64 format to the following website https://www.base64encode.org and paste the XML file output, make sure you select CRLF (Windows) and click ENCODE.

The encoded output will look like this.
PD94bWwgdmVyc2lvbj0iMS4wIiBlbmNvZGluZz0iVVRGLTgiPz4NCjxEZWZhdWx0QXNzb2NpYXRpb25zPg0KICA8QXNzb2NpYXRpb24gSWRlbnRpZmllcj0iLmh0bSIgUHJvZ0lkPSJDaHJvbWVIVE1MIiBBcHBsaWNhdGlvbk5hbWU9Ikdvb2dsZSBDaHJvbWUiIC8+DQogIDxBc3NvY2lhdGlvbiBJZGVudGlmaWVyPSIuaHRtbCIgUHJvZ0lkPSJDaHJvbWVIVE1MIiBBcHBsaWNhdGlvbk5hbWU9Ikdvb2dsZSBDaHJvbWUiIC8+DQogIDxBc3NvY2lhdGlvbiBJZGVudGlmaWVyPSIuc2h0bWwiIFByb2dJZD0iQ2hyb21lSFRNTCIgQXBwbGljYXRpb25OYW1lPSJHb29nbGUgQ2hyb21lIiAvPg0KICA8QXNzb2NpYXRpb24gSWRlbnRpZmllcj0iLnhodG1sIiBQcm9nSWQ9IkNocm9tZUhUTUwiIEFwcGxpY2F0aW9uTmFtZT0iR29vZ2xlIENocm9tZSIgLz4NCiAgPEFzc29jaWF0aW9uIElkZW50aWZpZXI9Imh0dHAiIFByb2dJZD0iQ2hyb21lSFRNTCIgQXBwbGljYXRpb25OYW1lPSJHb29nbGUgQ2hyb21lIiAvPg0KICA8QXNzb2NpYXRpb24gSWRlbnRpZmllcj0iaHR0cHMiIFByb2dJZD0iQ2hyb21lSFRNTCIgQXBwbGljYXRpb25OYW1lPSJHb29nbGUgQ2hyb21lIiAvPg0KPC9EZWZhdWx0QXNzb2NpYXRpb25zPg==