Keeping your development environment up-to-date is crucial for accessing the latest features, security patches, and performance improvements.
Visual Studio 2022 makes this easy with its auto-update feature. Here’s a simple guide to ensure you’re always up to date.
Configure Visual Studio 2022 for Auto-Updates
To set up automatic updates, go back to the main menu. Click “Tools”, then “Options”. In the options menu, navigate to “Environment” and then “Product Updates”.
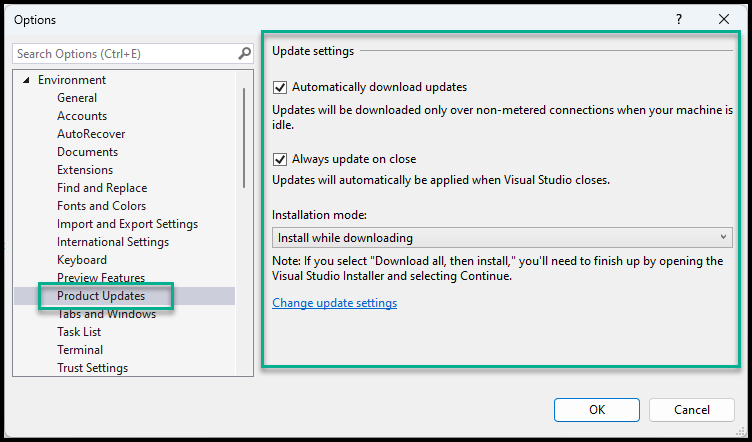
In the “Product Updates” section, you will find several settings to manage how updates are handled. Check the box labelled “Automatically download updates”. This ensures that updates will be downloaded in the background.
You can also decide how Visual Studio installs these updates. For minimal disruption, select “Install updates automatically at shutdown”. This will install updates when you close Visual Studio, saving you time during your active hours.
Additionally, you can choose to receive notifications when new updates are downloaded and ready to install. This is useful if you want to have more control over when updates are applied.
Lastly, don’t forget to click “OK” to save your settings. With these simple steps, your Visual Studio 2022 will stay updated automatically, helping you maintain a robust and secure development environment.
Keeping your software updated automatically can greatly enhance your productivity and security, letting you focus more on coding and less on maintenance tasks.
Check for updates
First, open Visual Studio 2022. On the toolbar, navigate to “Help” and then select “Check for Updates”. This lets you see if any updates are already pending.
If updates are available, a new window will pop up. Here, you can review the details of the updates. To proceed with downloading and installing them, simply click “Update”.