In this blog post, we will go through the steps to download files using PowerShell.
If you are working with Windows operating system, PowerShell is a powerful tool that can help you automate a variety of tasks. One of these tasks may be to download files from the internet.
Open PowerShell First, you need to open PowerShell. You can do this by typing “PowerShell” in the search bar of your Windows taskbar, and clicking on the “Windows PowerShell” result.
Navigate to the directory where you want to download the file Once you have opened PowerShell.
Invoke-WebRequest
Use the Invoke-WebRequest cmdlet to download the file Now that you are in the correct directory, you can use the Invoke-WebRequest cmdlet to download the file. The basic syntax for this command is as follows:
Invoke-WebRequest -Uri <file URL> -OutFile <file name>
Replace <file URL> with the URL of the file you want to download, and <file name> with the name you want to give the downloaded file. For example, if you want to download a file named “example.zip” from the URL “https://www.ntweekly.com/example.zip“, you can use the following command:
Invoke-WebRequest -Uri https://download.microsoft.com/download/c/4/4/c44313c5-f04a-4034-8a22-967481b23975/FSLogix_Apps_2.9.8440.42104.zip -OutFile fslogix.zip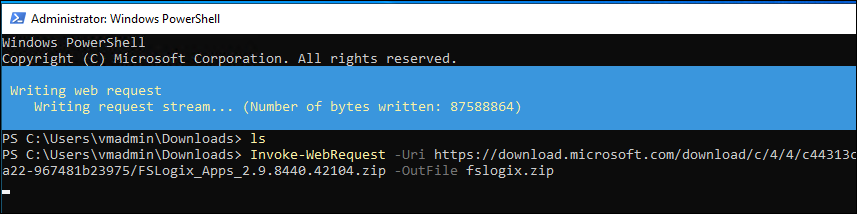
Check that the file has been downloaded After the download is complete, you can check that the file has been downloaded to the correct directory by using the “dir” command. For example, if you used the Downloads directory, you can use the following command:
dir