In this blog post, I will show you how to use PowerShell to create self-sign certificates and also view them using PowerShell.
Many reasons will require us to create a self-sign certificate where the common one is to secure the communication between machines.
In the post, I will focus on creating a certificate with the local machine name and a certificate with a custom DNS name.
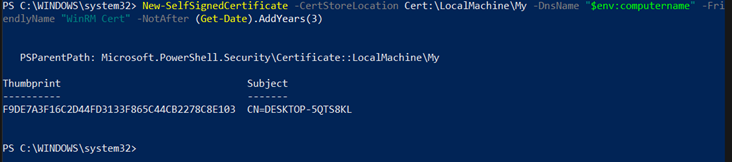
Create Certificate (Local computer name)
The PowerShell script below will create a certificate for the local computer name, and it will be valid for three years.
New-SelfSignedCertificate -CertStoreLocation Cert:\LocalMachine\My -DnsName "$env:computername" -FriendlyName "WinRM Cert" -NotAfter (Get-Date).AddYears(3)
Create Certificate ( DNS Name)
The PowerShell code below will create a Certificate with the DNS name of www.ntweekly.com.
New-SelfSignedCertificate -DnsName "www.ntweekly.com" -CertStoreLocation "cert:\LocalMachine\My"
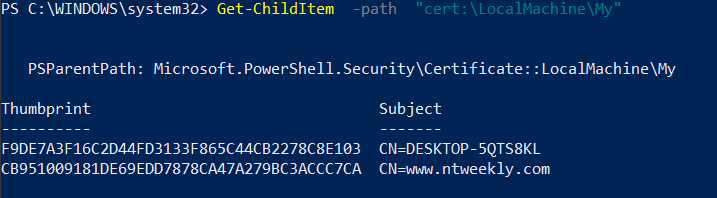
View Local Certificates
To view all the certificates on your local machine run the following PowerShell command.
Get-ChildItem -path "cert:\LocalMachine\My"
Processing…
Success! You're on the list.
Whoops! There was an error and we couldn't process your subscription. Please reload the page and try again.