In this article, I’ll show you how I manage my MySQL Database Server that I’ve Installed on my Windows Nano Server 2016.
In my last article, How To Install MySQL Database Server On Windows Nano Server 2016 (April 2017) I showed the end to end process to get MySQL Installed on Windows Nano Server 2016 however once Installed there are few more steps that need to be taken to get Users, Databases and management tools working.
So today, I’ll show you how to create a User, Database and use MYSQL Workbench to connect to a database successfully.
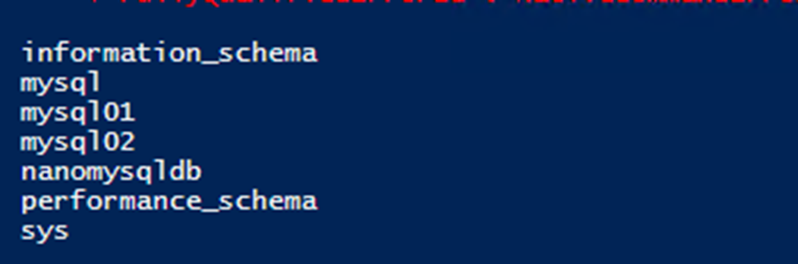
To get started, I’ll use the line below to view all my Databases
MySQL --user=root --password=Password123 -Bse "SHOW DATABASES;"

To create a new Database I use the line below
MySQL --user=root --password=Password123 -Bse "CREATE DATABASE MYSQL02 CHARACTER SET utf8 COLLATE utf8_bin;"
Next, I’ll create a new User
MySQL –user=root –password=Password123 -Bse “CREATE USER ‘NanoDBA’@’%’ IDENTIFIED BY ‘Password123’;”

MySQL --user=root --password=Password123 -Bse "GRANT ALL PRIVILEGES ON MYSQL02.* TO 'NanoDBA'@'%' WITH GRANT OPTION;"
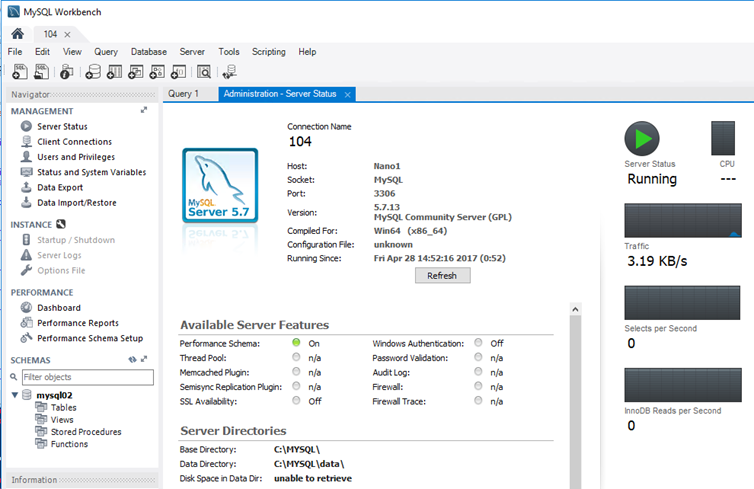
Now that I have my users and Databases up and running I could easily use MySQL Workbench to connect to