In this article, I’ll show you how I add a new physical hard Disk to my Windows Nano Server 2016 Hyper-V Host.
The first step, Is to add the new physical disk to my Nano Sever.
Next, I’ll need to connect to my Nano Server using Remote PowerShell:
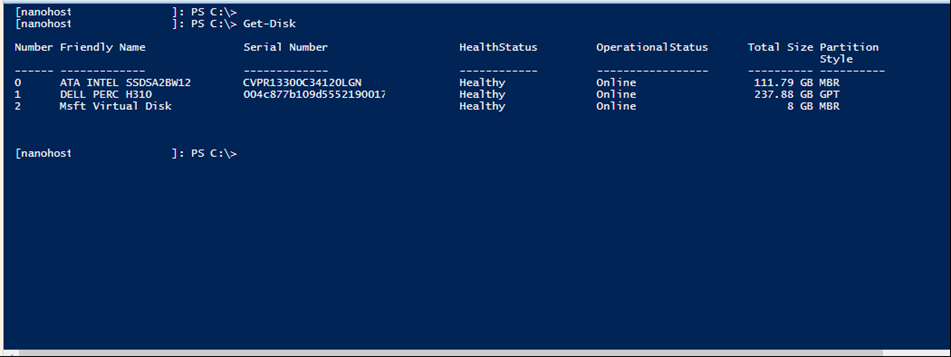
Once connected I’ll use the cmdlet below to view all disks Including the new disk:
Get-disk
My new disk Is disk Number 0
Next, I’ll clear all the data from the new Disk using the cmdlet:
Clear-Disk 0 -RemoveData
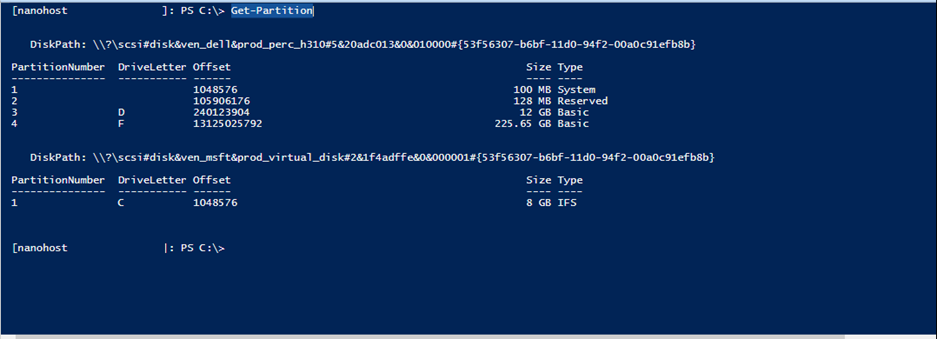
To view all partitions on the Server I type:
Get-Partition
Once the Disk Is cleared, I’ll Initialize the Disk using:
Initialize-Disk -Number 0
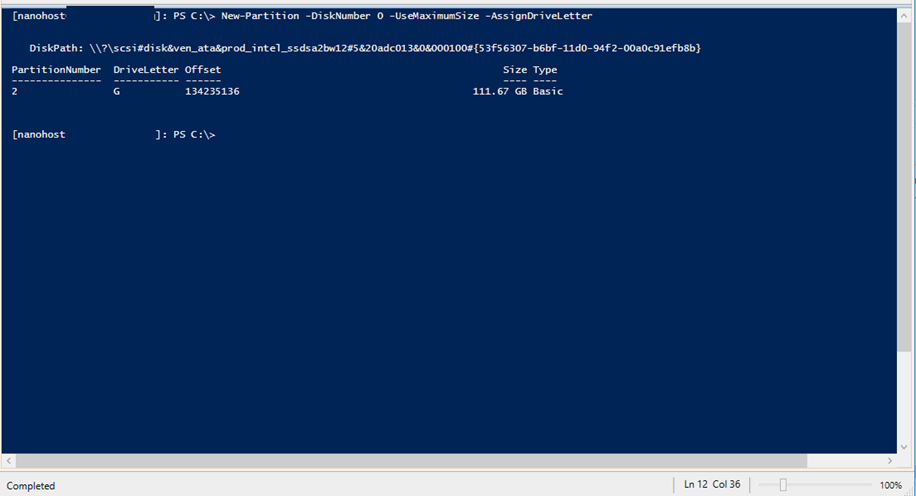
And I’ll create a new partition using:
New-Partition -DiskNumber 0 -UseMaximumSize -AssignDriveLetter
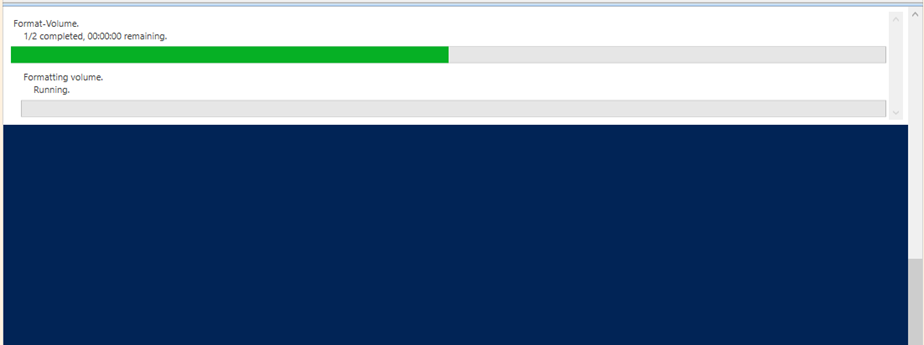
Next, I’ll format the disk using:
Format-Volume -DriveLetter g
Done

To view all the new volumes I use:
Get-volume
