In this blog post, I’ll show you how I clone a Windows Server 2016 Domain Controller and not use the normal installation method.
Using the normal method of Dcpromo can take very long time to complete in large environments because of the replication of all objects to the new DC.
When using Cloneable Domain Controllers there is no need to replicate all the object and the process can take 10 minutes to complete.
Cloneable Domain Controllers
First Introduced with Windows Server 2012, This method offers a fast deployment of Domain Controllers into the environment.
It also a consistent deployment of Domain Controllers that are the same across the network
Very handy in large environments.
In my case, I have two Domain Controllers running Windows Server 2016.
- VDC01 – Holds all the FSMO
- VDC02 – Secondary DC (I’ll clone this DC)
Requirements
To make it work you will need to meet the requirements below:
- Minimum two Domain Controllers available on the network
- Hyper-V 2012 Server and above
- The Domain Controllers need to run Windows Server 2012 and above
- PDC emulator must be running and online while cloning is happening
- You can’t clone a DC with any other roles or software installed on it.
Let’s get Started
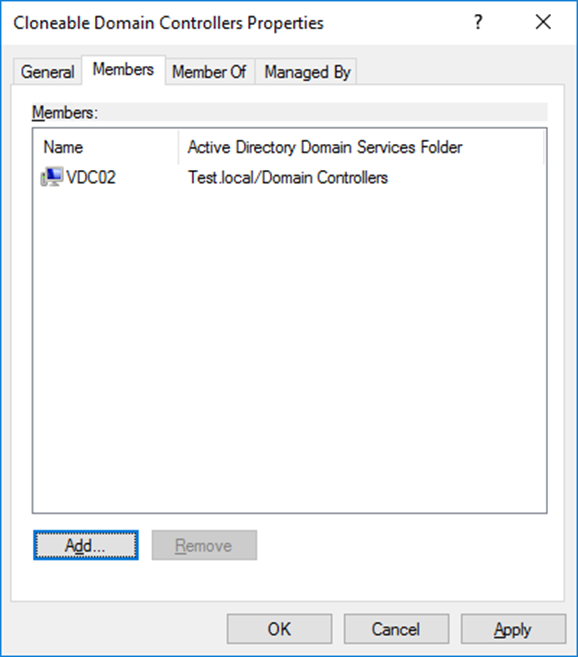
The first step in the process is to add the Domain Controller I will clone to the Cloneable Domain Controllers Group In Active Directory.
Note: Make sure this DC is not running any FSMO roles
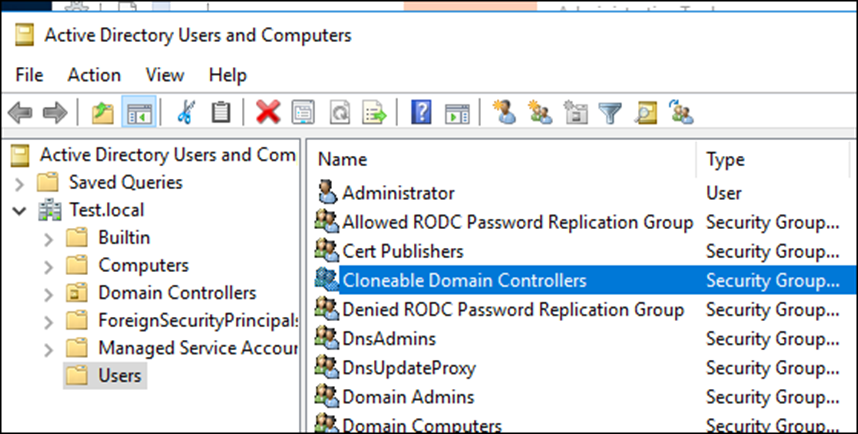
I’ll add and click apply
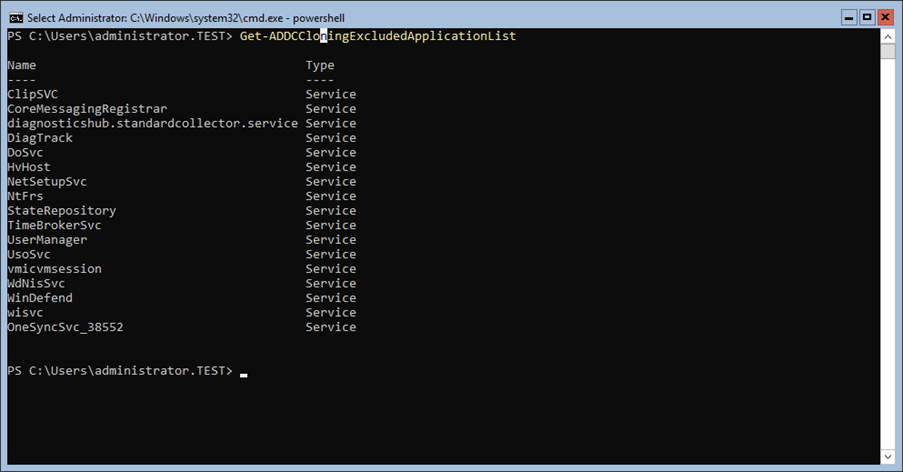
On VDC02, I’ll run the cmdlet below that will verify that the DC can be cloned.
Get-ADDCCloningExcludedApplicationList
Next, I’ll run the cmdlet below to create an XML file
Get-ADDCCloningExcludedApplicationList -GenerateXml

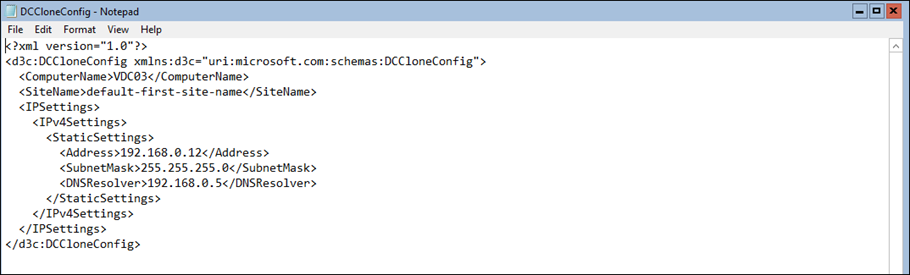
In the code below, I’ll include all the details of my new DC (Name, IP, Mask, AD Site name and DNS)
New-ADDCCloneConfigFile -CloneComputerName VDC03 -IPv4Address 192.168.0.12 -IPv4SubnetMask 255.255.2

55.0 -IPv4DNSResolver 192.168.0.5 -SiteName "default-first-site-name" -Verbose -Static
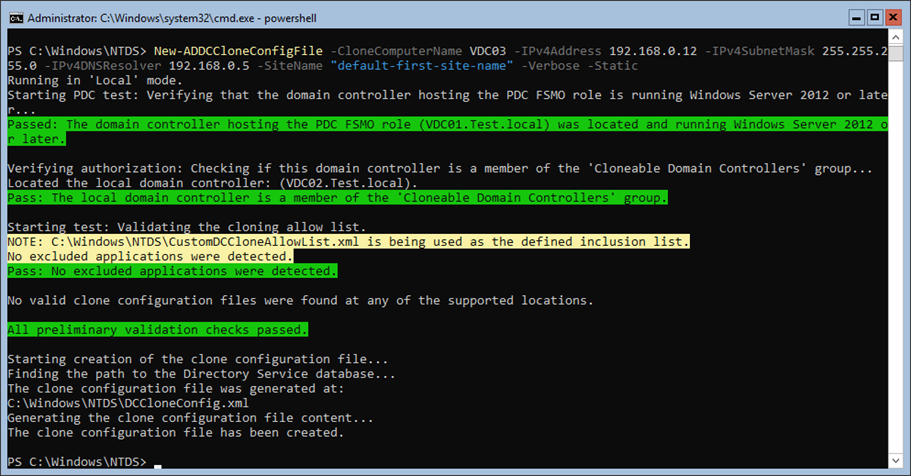
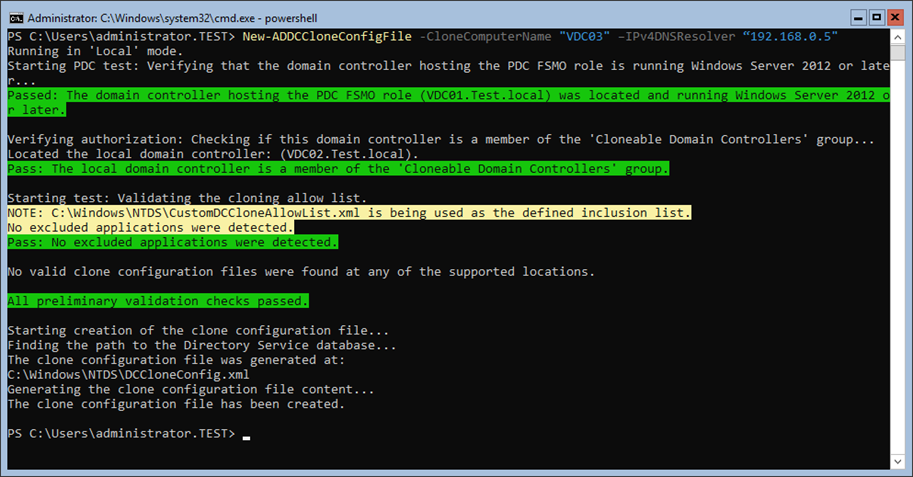
The cmdlet will create a file called DCCloneConfig with all the details on the new DC
At this stage, all the Active Directory work is done and I’ll go to the Hyper-V configuration where I’ll clone the VM and create a new one.
Hyper-V
To clone my VDC02, I’ll shut it down first and I’ll Export it.
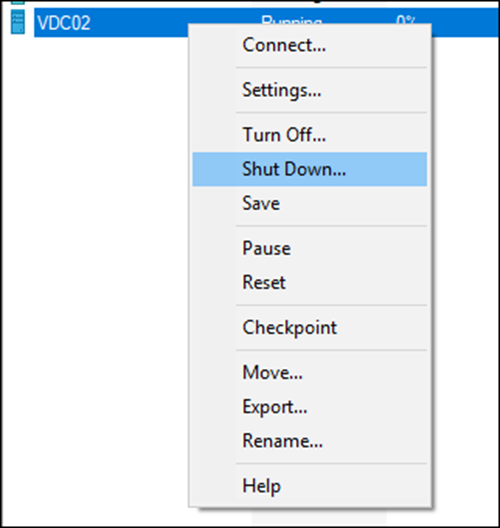
To export theVDC02 VM, I right click on the VM and click export

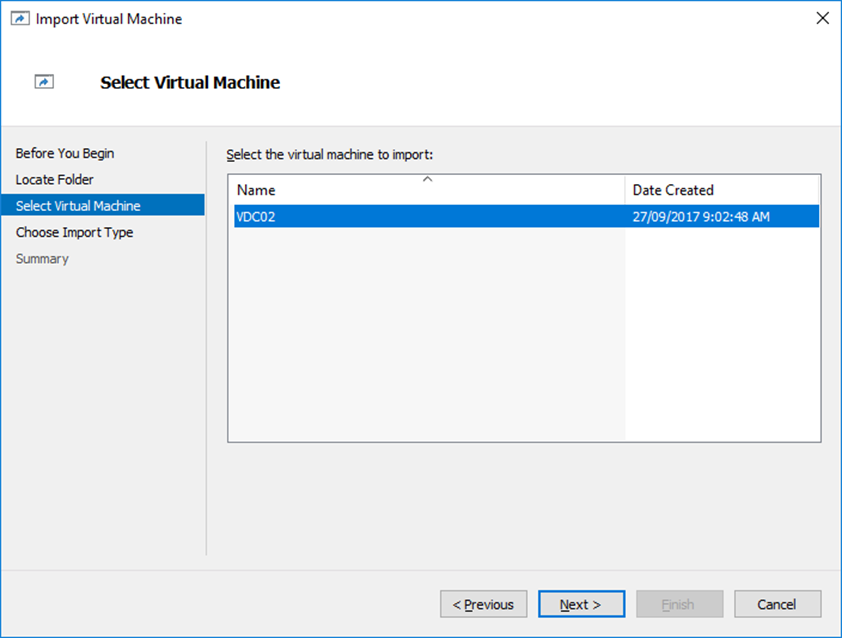
IMPORT
Once exported, I’ll create a new VM by using Import
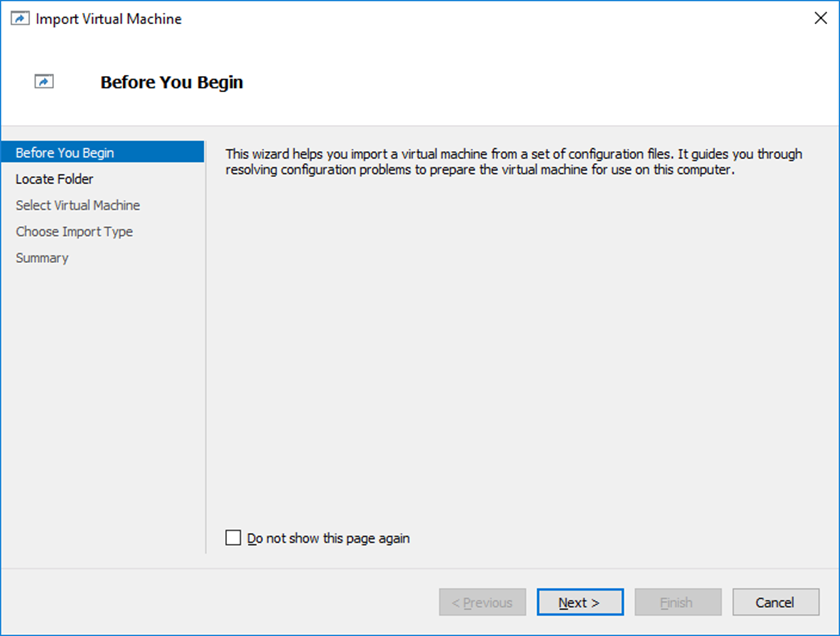
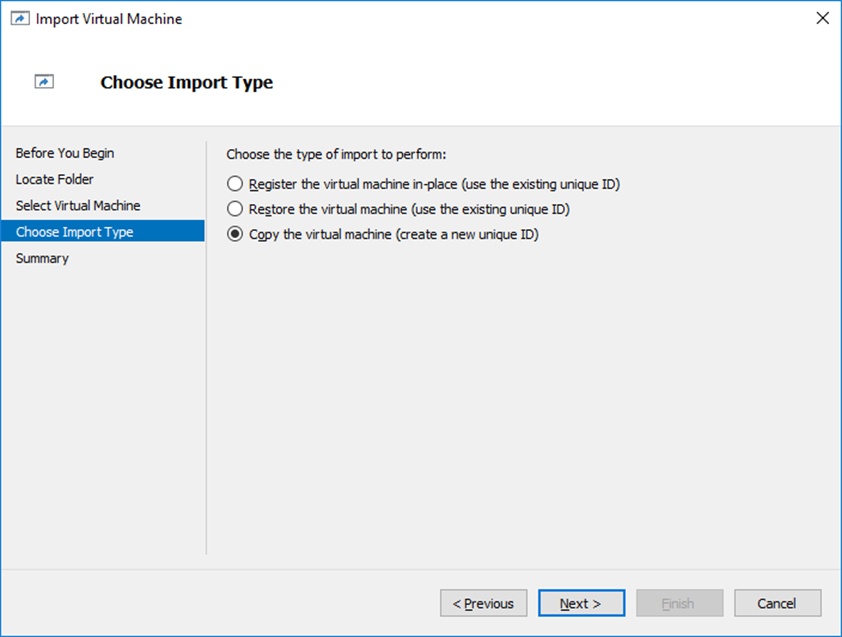
Very important, At this stage I must select Copy the virtual machine (create a new unique ID).
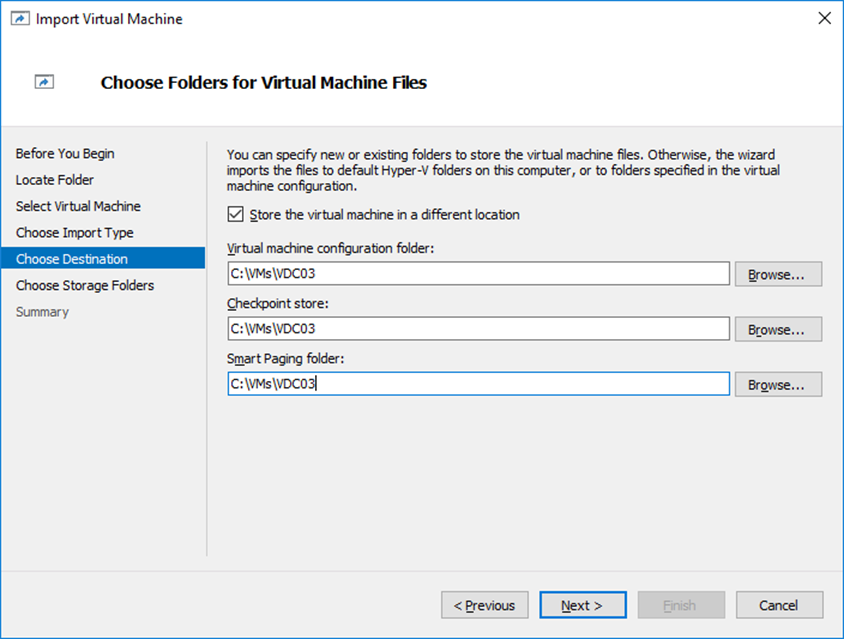
I’ll fill the configuration folder details
Next, I’ll power on both VMs

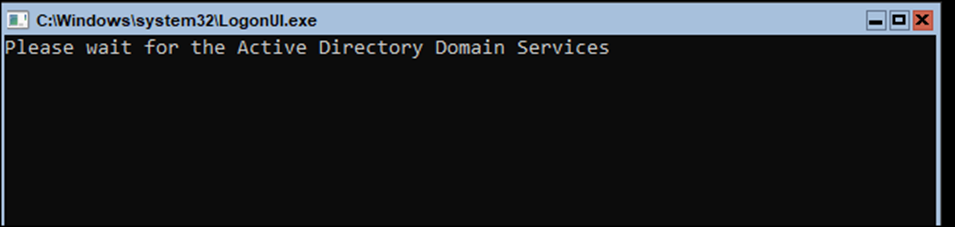
When VDC03 comes online it will start cloning
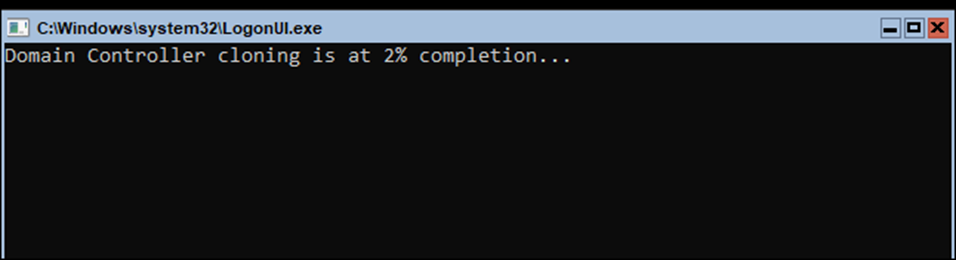
And as you can see below, it will start the AD DS services
When done, the VDC03 will appear in the Domain Controllers OU In Active Directory
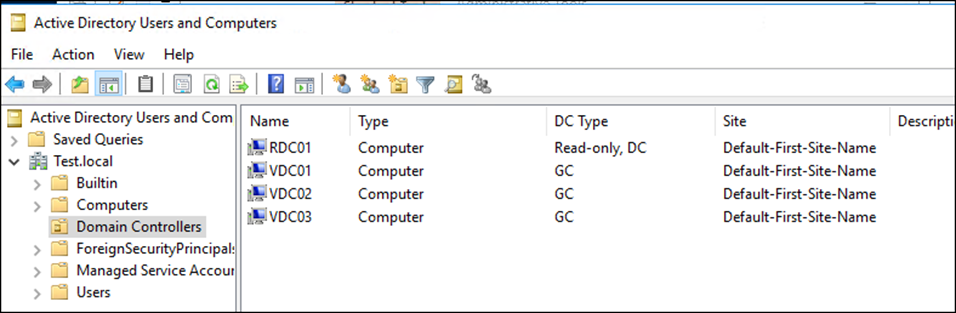
And If I type hostname I’ll see it as VDC03

Summary
Cloneable Domain Controllers is are really good and offer a new deployment method for DCs.
It’s not as simple as Installing a DC using the Add Roles and features wizard but it can be very handy in large environments where Hyper-V is used.