In this blog post, I’ll show you how to assign Office 365 Admin Roles to Office 365 users using Microsoft PowerShell.
Office 365 has a set of Admin roles that are mapped to common business functions and try to give users specific roles that needed for the business function.
Administrative Roles
Office 365 offers many administrative roles that cover every office 365 product like Skype for Business, SharePoint, Exchange Online, etc.
Using specific administrative roles allow us to use more granular control and delegate specific permissions to administrators without compromising other products.
Get Started
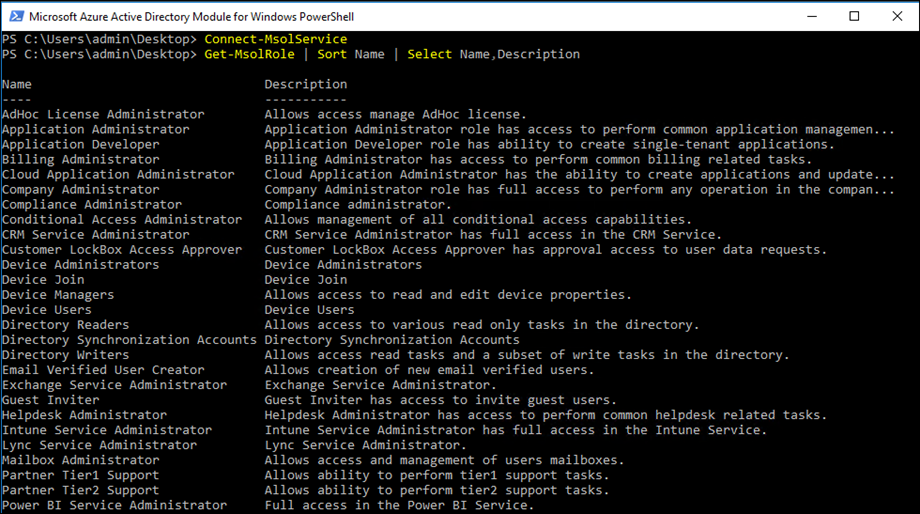
To get started, first connect to Office 365 using PowerShell and run the cmdlet let below to view all the available Administrative Roles.
Get-MsolRole | Sort Name | Select Name,Description
Assign Permissions
In the example below, I will assign the Billing Administrator role to a user name David.
$dispName = "David"

$roleName="Billing Administrator"

Add-MsolRoleMember -RoleMemberEmailAddress (Get-MsolUser | Where DisplayName -eq $dispName).UserPrincipalName -RoleName $roleName

Once done, I can view that the role has been assigned to David when I check his profile.

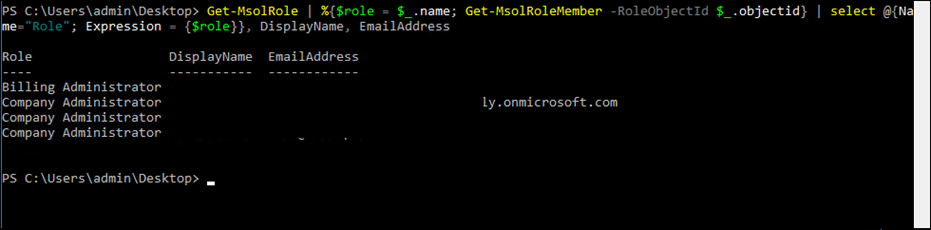
View All Assigned Roles
In the PowerShell code below, I will
To view all Assigned Office 365 Administrative Roles using PowerShell I’ll run the cmdlet below.
Get-MsolRole | %{$role = $_.name; Get-MsolRoleMember -RoleObjectId $_.objectid} | select @{Name="Role"; Expression = {$role}}, DisplayName, EmailAddress
Last time I checked Office 365 offers 13 Admin Roles, so it is recommended to always try to use admins roles before assigning the Global Administrator role.