In this blog post, I’ll show you how to create multiple Room Mailboxes in Office 365 Exchange Online using PowerShell.
Room Mailboxes in Exchange Online are free of charge and come with any Office 365 Exchange Online subscription.
The Exchange Admin Center allows us to create rooms manually from the GUI however for advanced features like resource Booking Attendant and External meetings processing we have to use the Exchange Online PowerShell module to configure them.
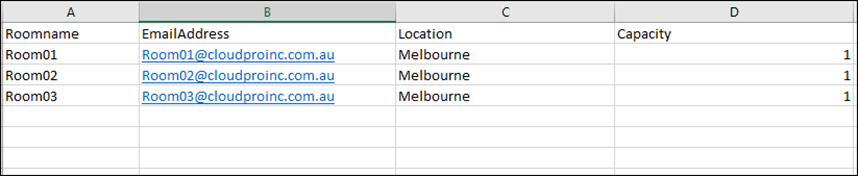
CREATE A CSV File
In my case, I’ll create a few room mailboxes using a .CSV file (see below) with very basic information.
The script will work with one room or 100.
Once I have the .CSV file ready, I’ll connect to Exchange Online and run the cmdlet below to create the rooms.
Import-csv .\Rooms.csv | foreach{ New-Mailbox -Name $_.roomname -Room -PrimarySmtpAddress $_.emailaddress -ResourceCapacity $_.capicity }
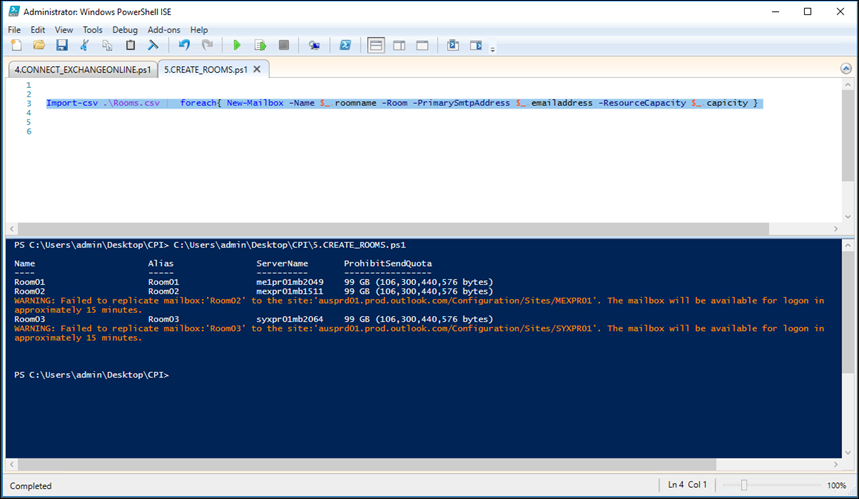
As you can see below, the rooms are available immediately

I can also use the cmdlet below to view them
Get-Mailbox -ResultSize unlimited -Filter {(RecipientTypeDetails -eq 'RoomMailbox')}

Resource Booking Attendant
The Resource Booking Attendant allows us to automate the processing of meetings request to a Room Mailbox and automate the entire process.
We can only enable Resource Booking Attendant using Exchange PowerShell.
To enable resource Booking Attendant on all the rooms, I’ll use cmdlet below:
Import-csv .\Rooms.csv | foreach{ set-CalendarProcessing $_.roomname -AutomateProcessing autoaccept }
Note: To disable the I’ll use AutoUpdate

Enable External Meeting Processing
To allow, External users to send meeting requests to the room mailbox and book the room I’ll run the cmdlet below:
Import-csv .\Rooms.csv | foreach{ set-CalendarProcessing $_.roomname -ProcessExternalMeetingMessages $true }
I could also enable this feature on a specific mailbox using the cmdlet below
Set-CalendarProcessing Room01 -ProcessExternalMeetingMessages $True
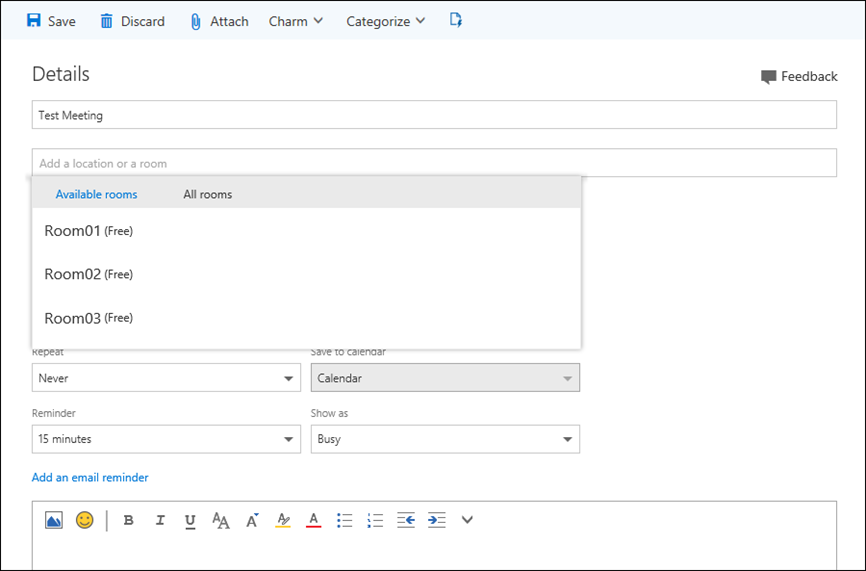
See it in action
Now, when I create a new meeting request and add a location I’ll see all the new rooms and I can select them from the menu
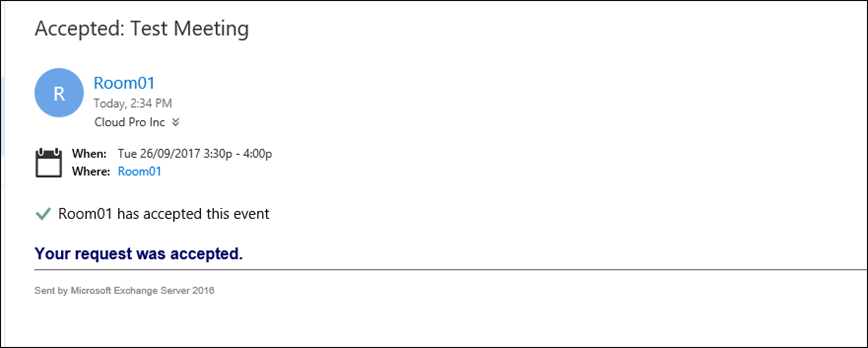
If the room is available, I’ll receive a confirmation email from the room via the Resource Booking Attendant
And I can also locate all rooms from the Address Book under All Rooms

