In this article I’m going to show you how I add a Virtual Network Interface to a existing Virtual Machine running In Microsoft Azure.
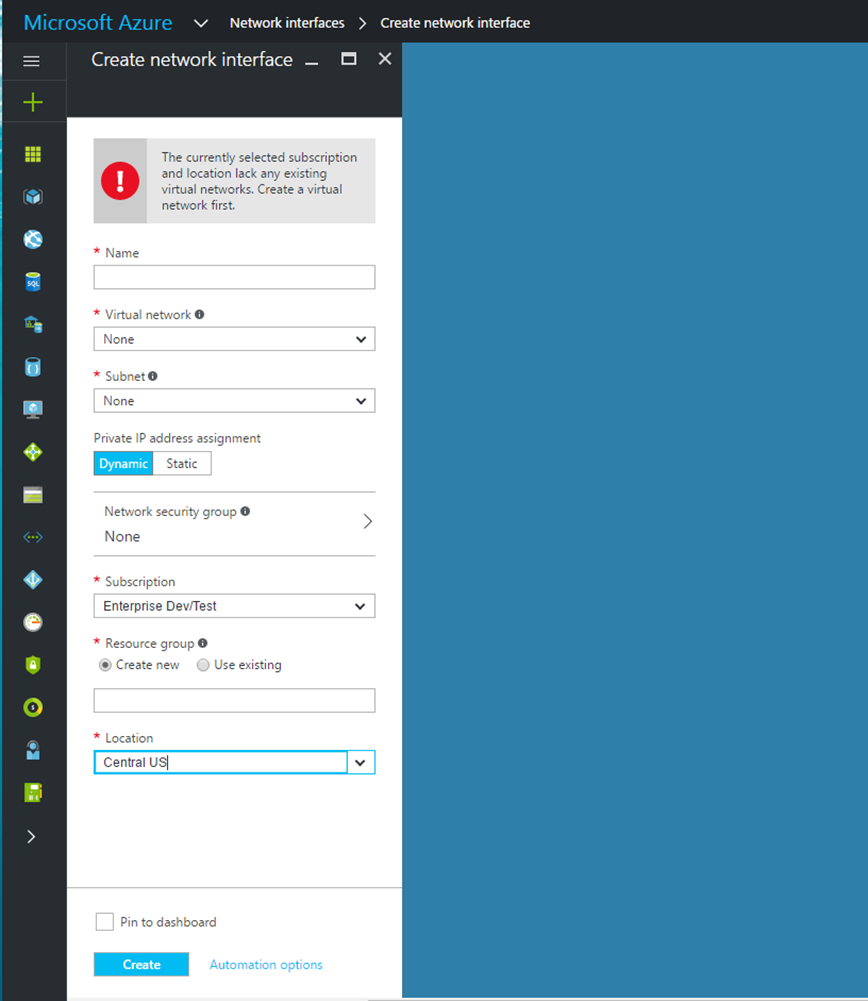
To get started login to the Azure Portal and add a Network Interface, make sure you add It to the same RG the Virtual Machine reside .
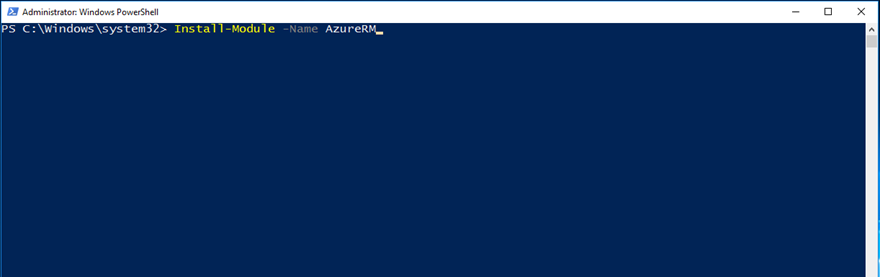
Next, Install the AzureRM PowerShell module.
Install-Module -Name AzureRM
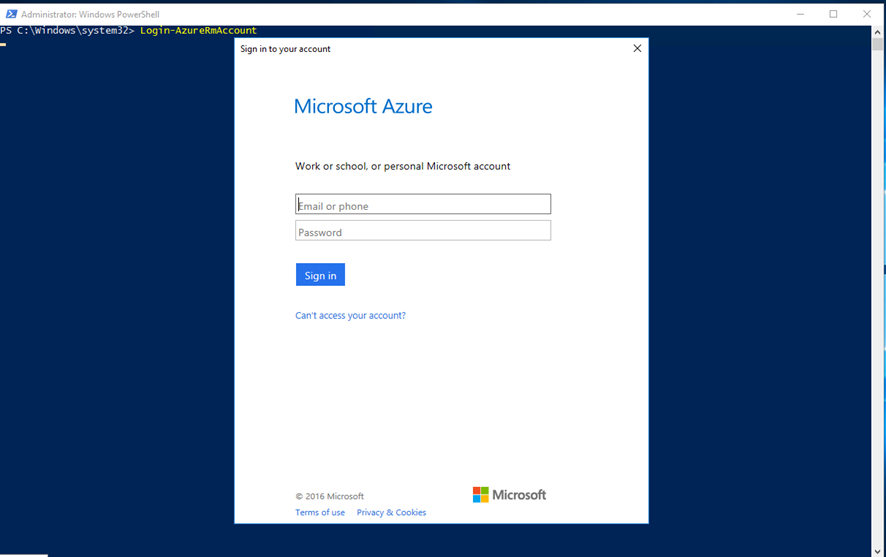
Login to Azure with the cmdlet:
Login-AzureRMaccount
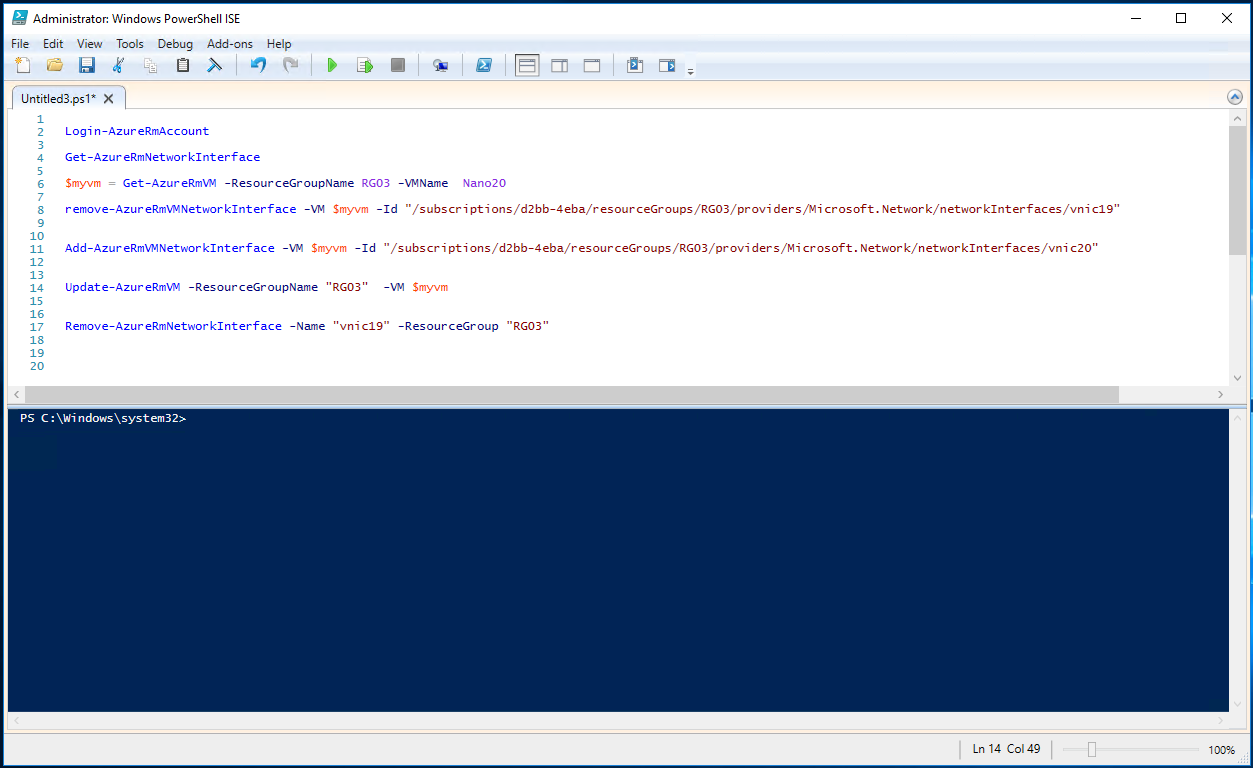
In my case I have created a vNic called vnic20 and I’m going to remove Vnic19 and attached vNic20 to a VM called Nano20
Step 1: Get the ID of the newly created vNic
Get-AzureRmNetworkInterface
Step 2: Save the VM you want to add the vNic to a variable
$myvm = Get-AzureRmVM -ResourceGroupName RG03 -VMName Nano20
Step 3: Remove currently attached Interface
remove-AzureRmVMNetworkInterface -VM $myvm -Id "/subscriptions/d2bb-4eba/resourceGroups/RG03/providers/Microsoft.Network/networkInterfaces/vnic19"
Step 4: Add newly vNic
Add-AzureRmVMNetworkInterface -VM $myvm -Id "/subscriptions/d2bb-4eba/resourceGroups/RG03/providers/Microsoft.Network/networkInterfaces/vnic20"
Step 5: Update VM with new Settings
Update-AzureRmVM -ResourceGroupName "RG03" -VM $myvm
Step 6: Delete old vNic
Remove-AzureRmNetworkInterface -Name "vnic19" -ResourceGroup "RG03"
Comments
One response to “Add A Virtual Network Interface To Existing Azure Virtual Machine”
How you created the new NIC? In the first screen it says there is no virtual network. I have the same issue, but the virtual network exists.