In this two article series I’ll show you how to configure your Office 365 \ SharePoint online to host your public website.
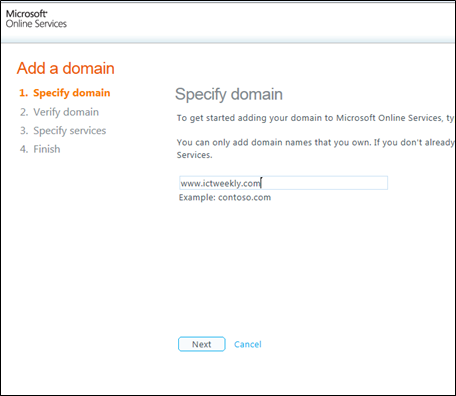
The first step you need to take is to add a domain name to your Office 365 account which will start with WWW.
Go to the Add Domain and add your domain starting with WWW
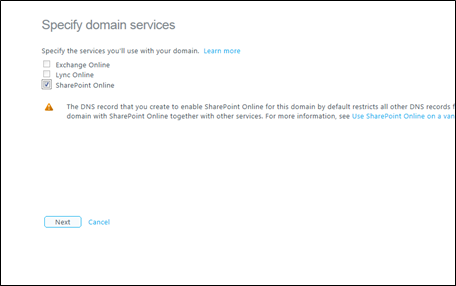
In the next page select Sharepoint Online
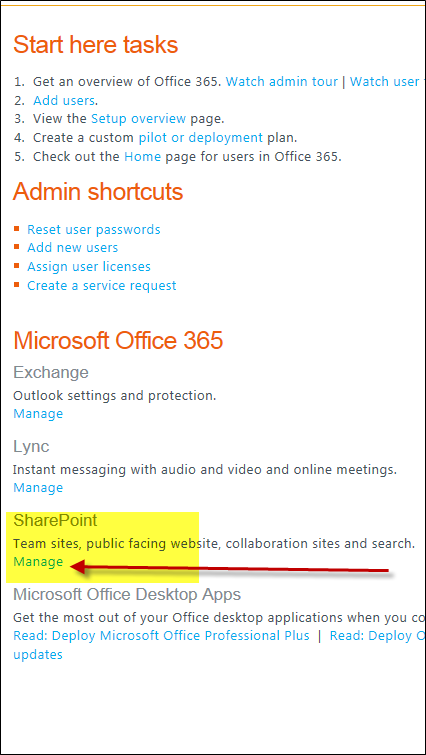
Next go to the Admin page in the Office 365 Portal and click on Manage under Sharepoint.
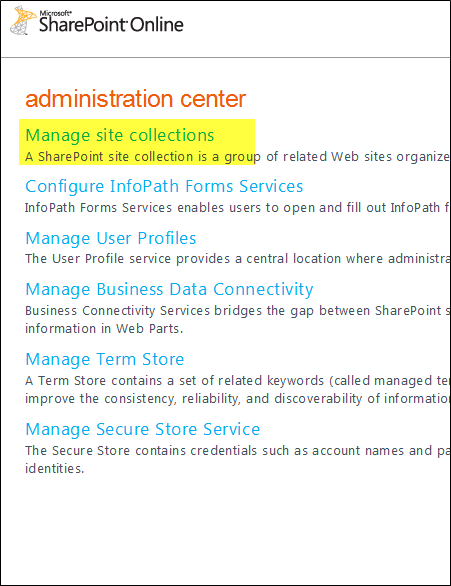
In the SharePoint administration center click on the Manage site collections
In the site collection page click on DNS information and take a note of the hostname
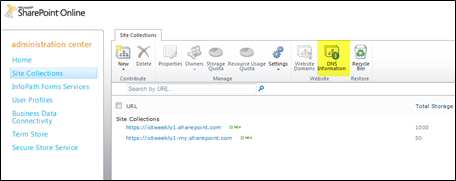
The entry below is where your website is hosted on Sharepoint Online, Take a note of this entry and keep it for the next step.
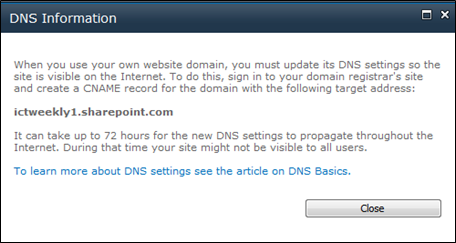
On your hosting provider (Go Daddy in my case) DNS manger change or create a CNAME record similar to the entry below with the details of the DNS information.
